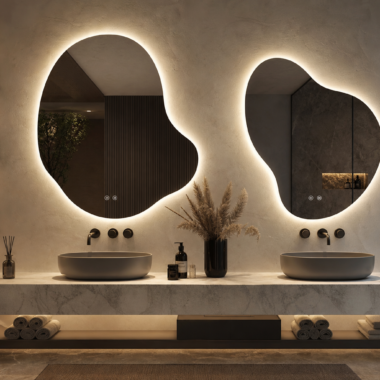
An LED mirror looks flawless in the showroom. Six months later, in a Mumbai bathroom during monsoon season, it can develop water spots, foggy edges, and a film of grime that no amount of wiping seems to fix.
The problem is not the mirror — it is the maintenance approach. Indian bathrooms face challenges that European or American bathrooms rarely see: hard water with high TDS levels, extreme humidity swings, daily power fluctuations, and dust that settles on every surface within hours of cleaning.
This guide covers everything you need to keep an LED mirror looking new, from daily wipe-downs to fixing common issues like cloudy glass, flickering LEDs, and failing touch sensors.
Understanding What You Are Cleaning
An LED mirror is not a single surface — it is a layered assembly. The front is tempered glass, often with an anti-reflective coating. Behind that sits the LED driver, wiring, and either a reflective backing (for frontlit mirrors) or a gap for backlighting. The edges may be sealed with silicone or a rubber gasket to keep moisture out.
Each layer responds differently to cleaners. Ammonia-based glass cleaners can damage anti-reflective coatings. Abrasive scrubbers scratch the glass. Water that seeps past the edge seal can corrode the LED strips or short the driver.
The goal of maintenance is to clean the glass without compromising the seal, the coating, or the electronics.
Daily Cleaning: The 30-Second Routine
Most mirror grime is surface-level: toothpaste spray, water droplets, and soap residue. These do not bond to the glass — they sit on top and can be wiped away with minimal effort if you catch them within a few hours.
What You Need
- Microfiber cloth (dry)
- Distilled water or regular tap water
- Small spray bottle
Process
- Spray a light mist of water onto the mirror (not directly onto the edges or the frame)
- Wipe in a single direction — top to bottom or left to right, not in circles
- Flip the microfiber cloth to a dry section and wipe again to remove streaks
- Done
This takes 30 seconds and prevents buildup. If you do this after your morning routine, you will rarely need deep cleaning.
Weekly Deep Cleaning
Once a week, clean the mirror more thoroughly to remove the buildup that daily wiping misses: hard water deposits, soap scum around the edges, and dust on the LED strip housing.
What You Need
- Microfiber cloth (2-3 pieces)
- White vinegar (5% acidity)
- Distilled water
- Spray bottle
- Cotton swabs (for edges and corners)
Homemade Cleaning Solution
Mix equal parts white vinegar and distilled water in a spray bottle. This solution dissolves hard water stains and soap scum without damaging the glass or coating. Vinegar’s acidity is strong enough to break down mineral deposits but mild enough not to corrode the mirror’s reflective backing.
If you do not have distilled water, use filtered water or let tap water sit for 24 hours to allow chlorine to evaporate. High-chlorine water can leave streaks on the glass.
Process
- Turn off the LED mirror at the power source (not just the touch sensor — switch off the circuit breaker or unplug it if it uses a plug point)
- Spray the vinegar solution onto a microfiber cloth, not directly onto the mirror. This prevents liquid from seeping into the edges or behind the glass.
- Wipe the glass in overlapping horizontal strokes, starting from the top. Work your way down to the bottom.
- Use a cotton swab dipped in the solution to clean around the edges, the touch sensor area, and any recessed corners where dust collects.
- Switch to a dry microfiber cloth and wipe the entire surface again to remove moisture and streaks.
- Wait 5 minutes for the glass and edges to fully dry before turning the power back on.
If your mirror has an anti-fog coating, avoid scrubbing with heavy pressure. The coating is a thin hydrophilic layer that prevents condensation, and aggressive wiping can wear it down over time. Gentle, consistent wiping is better than hard scrubbing.
Removing Hard Water Stains (High TDS Water)
Indian tap water often has TDS (Total Dissolved Solids) levels above 500 ppm — well above the 150 ppm that most glass cleaners are designed to handle. When this water evaporates on your mirror, it leaves behind calcium and magnesium deposits that look like cloudy white spots or streaks.
Standard glass cleaners do not touch these stains because they are not grease or dirt — they are mineral crystals bonded to the glass.
What You Need
- White vinegar (undiluted)
- Baking soda
- Microfiber cloth
- Soft sponge
Process for Light Stains
- Soak a microfiber cloth in undiluted white vinegar.
- Press the cloth against the stained area for 3-5 minutes. Do not rub yet — let the acidity dissolve the mineral layer.
- Wipe gently in small circles. The stain should lift with minimal pressure.
- Rinse with distilled water and dry with a clean cloth.
Process for Heavy Stains
- Make a paste of baking soda and water (3 parts baking soda to 1 part water).
- Apply the paste to the stain with a soft sponge. Baking soda is mildly abrasive — it scrubs without scratching.
- Rub in gentle circles for 20-30 seconds.
- Wipe off the paste with a damp cloth.
- Follow up with the vinegar solution to neutralize any remaining mineral residue.
- Dry thoroughly.
For mirrors in areas with very hard water (Chennai, Pune, Gurgaon), wipe the mirror dry immediately after every use. Even a few water droplets left to evaporate will create visible spots within a week.
Cleaning the LED Strip and Housing
Dust accumulates on the LED strip housing and the mirror’s back panel, especially in cities with high airborne dust (Delhi, Ahmedabad). This dust layer reduces the brightness of backlit mirrors and can cause the LEDs to overheat.
What You Need
- Soft brush (a clean makeup brush or a paintbrush works)
- Compressed air canister (optional)
- Dry microfiber cloth
Process
- Turn off the mirror at the power source.
- Gently brush dust away from the LED strip housing and the back panel (if accessible). Do not use water or cleaning solution on the LEDs or driver.
- If you have a compressed air canister, blow dust out of the recessed areas where the brush cannot reach.
- Wipe the outer frame with a dry cloth.
Do this every 2-3 months in low-dust areas, monthly in high-dust areas.
Maintaining the Anti-Fog Function
Most LED mirrors with anti-fog heating use a thin resistive pad behind the glass. When you turn on the anti-fog function, the pad heats the glass to 5-10°C above room temperature, which prevents condensation.
Over time, the anti-fog performance can degrade if:
- The mirror is not cleaned regularly (grime on the glass reduces heat transfer)
- The heating pad is left on continuously (it is designed for intermittent use, 15-20 minutes at a time)
- Moisture seeps into the back panel and corrodes the heating element
How to Extend Anti-Fog Life
- Turn on the anti-fog heater 2-3 minutes before you shower, not after the mirror has already fogged up
- Turn it off once the glass is clear — do not leave it running for hours
- Keep the edges sealed. If you notice gaps in the edge seal, apply a thin bead of bathroom-grade silicone to prevent water ingress.
If the anti-fog stops working entirely, the heating pad has likely failed. This is usually a warranty issue if the mirror is under 1-2 years old. Contact the supplier for a replacement or repair.
Troubleshooting Common LED Mirror Issues
LEDs Flickering or Dimming
Cause: Loose wiring, failing driver, or voltage fluctuations from the power supply.
Fix:
- Turn off the power and check all wire connections behind the mirror. Tighten any loose connections.
- If the flickering happens during peak electricity usage hours (evening), your home’s voltage may be dropping below 200V. Install a voltage stabilizer on the bathroom circuit.
- If the LEDs are dimming gradually over weeks, the driver may be failing. Drivers typically last 30,000-50,000 hours, but power surges can shorten this. Replace the driver (most manufacturers sell replacement drivers for ₹1,500-3,000).
Touch Sensor Not Responding
Cause: Moisture on the sensor surface, sensor calibration drift, or sensor failure.
Fix:
- Wipe the sensor area with a dry cloth. Touch sensors rely on capacitance changes, and a water film can block the signal.
- Turn off the mirror for 30 seconds, then turn it back on. This resets the sensor calibration.
- If the sensor still does not respond, check if the sensor cable is securely connected to the driver. A loose cable is a common issue after installation.
- If the sensor is physically damaged (cracked or corroded), it will need replacement. Contact the supplier.
Cloudy or Hazy Glass
Cause: Hard water buildup, residue from cleaning products, or moisture trapped behind the glass.
Fix:
- Clean with the vinegar solution described above. If the haze persists, it may be mineral buildup that has etched the glass. Try the baking soda paste method.
- If the cloudiness is inside the glass (you can see it when the LEDs are on but not in direct light), moisture has penetrated the seal. This usually means the edge seal has failed. You will need to re-seal the edges or replace the mirror if the damage is extensive.
Mirror Gets Too Hot
Cause: Poor ventilation around the driver, or the driver is undersized for the LED load.
Fix:
- Ensure there is at least 2 inches of clearance behind the mirror for airflow. If the mirror is mounted flush against the wall with no air gap, heat builds up.
- Check the driver’s wattage rating. If you have a 40W LED strip running on a 30W driver, the driver will overheat. Replace with the correct wattage driver.
- If the room is very hot (above 35°C), the driver may struggle to dissipate heat. Improve bathroom ventilation with an exhaust fan.
LED Color Has Shifted (Yellowish or Bluish)
Cause: LED degradation over time, or the color temperature setting has drifted.
Fix:
- If your mirror has adjustable color temperature (3000K/4500K/6000K), cycle through the settings to confirm the LEDs still produce all three temperatures. If one setting looks off, the corresponding LED channel may be failing.
- LED color shift is normal after 20,000+ hours of use. If the shift is severe (from cool white to warm yellow), the LED strips are near end-of-life and should be replaced.
What Not to Use on LED Mirrors
Ammonia-Based Glass Cleaners (Windex, Colin)
Ammonia can damage anti-reflective coatings and anti-fog coatings. It also leaves streaks on mirrors with high-CRI LEDs because the chemical residue becomes visible under high-quality light.
Abrasive Sponges or Scrubbers
Steel wool, green scrub pads, and rough sponges will scratch the glass. Even micro-scratches are visible when the LEDs are on because the light refracts through the scratches.
Acetone or Nail Polish Remover
These solvents can dissolve the silicone edge seal and damage the reflective backing. If you accidentally spill nail polish remover on the mirror, wipe it off immediately with water and dry thoroughly.
Bleach or Harsh Alkaline Cleaners
Bleach can corrode the LED strips and wiring if it seeps into the edges. It also discolors the mirror’s reflective backing over time.
Paper Towels
Paper towels leave lint and micro-scratches on glass. Use microfiber cloths instead — they are lint-free and non-abrasive.
Preventive Maintenance: Making the Mirror Last Longer
Install a Bathroom Exhaust Fan
High humidity accelerates corrosion of the LED driver and wiring. An exhaust fan reduces bathroom humidity from 80-90% (immediately after a shower) to 50-60% within 10 minutes. Run the fan for 15 minutes after every shower.
Use a Voltage Stabilizer
Power surges and voltage drops are common in Indian cities during peak hours. A voltage stabilizer protects the LED driver from damage. A 500VA stabilizer costs ₹1,500-2,000 and extends the mirror’s lifespan by 2-3 years.
Check the Edge Seal Annually
Inspect the silicone or rubber seal around the mirror’s edge once a year. If you see cracks, gaps, or discoloration, reapply bathroom-grade silicone sealant. A failing seal lets moisture into the electronics, which leads to early failure.
Replace the Driver Before It Fails
LED drivers typically last 30,000-50,000 hours (about 10-15 years with 2-hour daily use). If your mirror is 8-10 years old and the LEDs are dimming or flickering, replace the driver preemptively. Waiting until the driver fails completely can damage the LED strips.
Cleaning Frequency by Climate Zone
Coastal Cities (Mumbai, Chennai, Kochi)
High humidity and salt air accelerate corrosion. Wipe the mirror daily and deep-clean weekly. Check the edge seal every 6 months.
Dry Cities (Delhi, Pune, Ahmedabad)
Dust buildup is the main issue. Wipe daily to prevent dust from sticking to water spots. Deep-clean every 10 days. Clean the LED housing monthly.
Moderate Climate Cities (Bangalore, Hyderabad)
Lower humidity and moderate dust. Wipe 3-4 times a week, deep-clean every 2 weeks. LED housing cleaning every 2-3 months.
Final Thoughts: Maintenance Is Not Restoration
The goal of maintenance is to prevent damage, not to fix it after it happens. A daily 30-second wipe prevents the hard water stains that require 10 minutes of scrubbing later. A voltage stabilizer costs ₹2,000 but prevents a ₹8,000 driver replacement.
Treat the LED mirror like you would treat a phone screen — wipe it regularly, protect it from impacts and moisture, and it will look new for years.
Browse our LED mirror collection to find mirrors with anti-fog, high IP ratings, and replaceable drivers, or contact us for maintenance advice specific to your mirror model.
Recommended Products
Based on this article, you might also like: